First of all here is a list of materials you will need for this project:


Step 3
Cut out enough fabric to cover the false bottom. Cover the batting and glue fabric to cardboard. Do the same for your stitched piece and the top lid.

Step 4
Cut a strip of fabric to go around the outside of the lid. I press one end of the fabric under 1/4 inch. This allows for a nice straight edge to line up the bottom of the lid with the fabric. I also do this at the end of the fabric so no raw edges will be seen.

Step 5
Glue the fabric down to the top of the lid.

Step 6
Center stitched piece on cardboard and glue down. Glue the stitched piece to the top lid. I usually place a heavy (but not to heavy!) book on top to press together and let dry for a few hours.

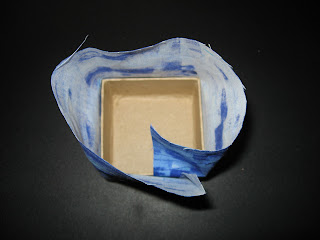
Step 7
Cut a piece of fabric big enough to cover the inside AND outside of the box. I start mine by placing the fabric about 1/2 overlapping the bottom of the box and I press the fabric down as I turn the box in my hands. Once that is done then I glue the extra fabric down on the bottom of the box. You should have enough fabric extra to tuck the fabric down and glue to the inside of the box.
Step 8

Step 9
Insert false bottom into the box.

Step 10
Cut a piece of fabric big enough to cover the bottom of the box. Glue down. I like to take a small (and I mean just a tiny amount!) amount of glue on my finger and run it all the way around where the sides meet the bottom.

At this point I let the whole thing dry for a few hours and then I can add my ribbon and/or cording to make it pretty. :)

I hope this is helpful to everyone! :)